If you are of the creative mindset, you might have noticed the art of paint pouring become extremely popular this year. Similarly to acrylic paint pouring, we have noticed resin art has become very popular. And it’s easy to see why!
Have you been thinking about creating your own resin art but are perhaps unsure of where to start? Then this is the post for you!
We will break everything down into easy to follow instructions and offer you some handy tips and advice to make your art the best it can possibly be.
- What is resin?
- How do you use resin?
- What do you need to create resin art?
- How to create your first resin painting
- How to clean up
What is resin?
Resin (or otherwise known as epoxy resin) consists of 2 liquid components (a resin and a hardener) that when mixed together and left to dry form into a solid plastic-esque material. When used as is, the resin will result in a highly glossy clear finish similar in look to water.
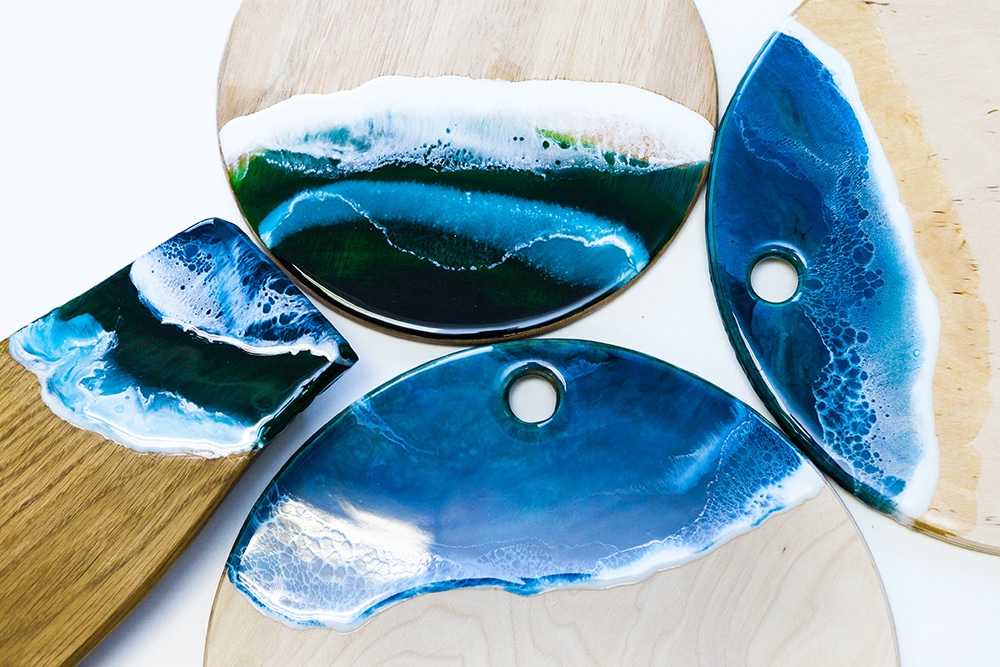
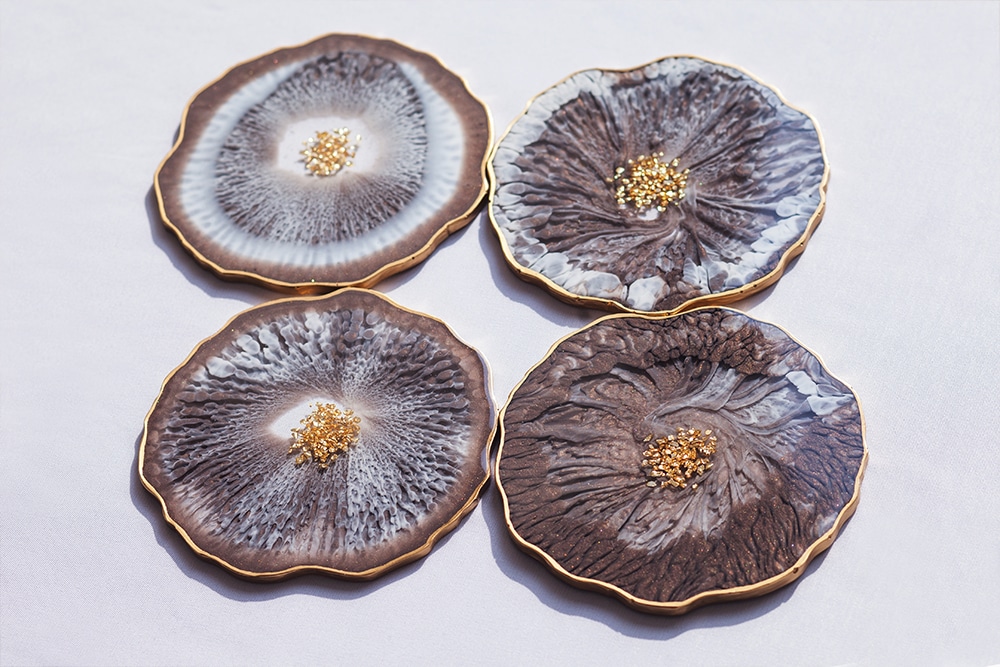
It is a very versatile product that is used for a wide variety of things including flooring, in the woodwork industry, in the marine industry and many more. In the art world, resin is often used to create jewellery, coasters, sculptures, bowls and more!
How do you use resin?
If you are one for experimenting with your art, you should enjoy using resin. As it’s so versatile, you can use it for just about anything!
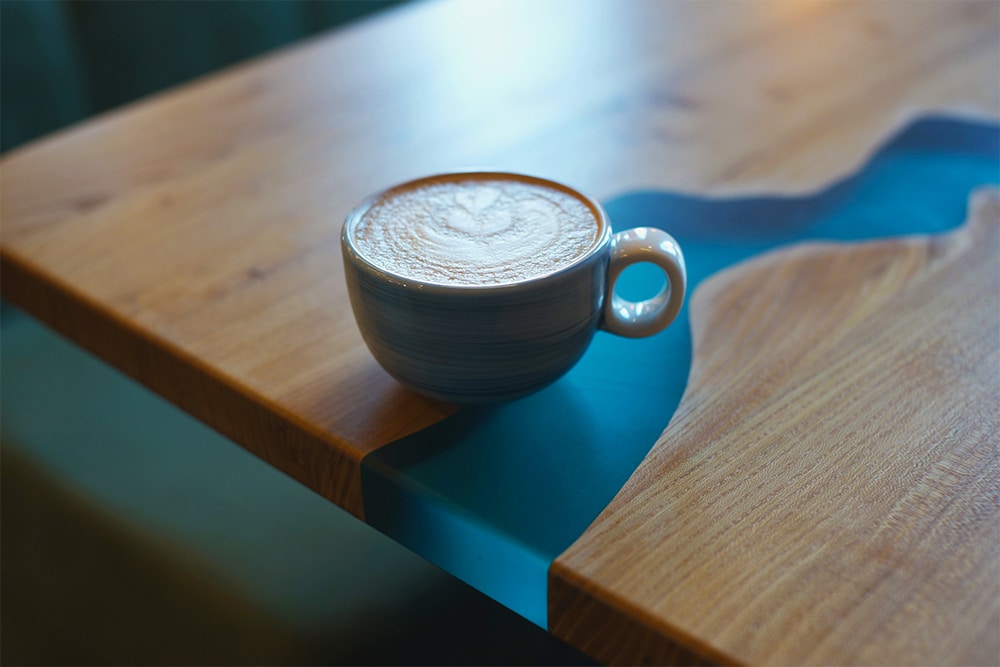
As we mentioned earlier, resin is created when you mix a resin and a hardener together. Once created, how you choose to use it is completely up to you. A common use is for embellishing previously created art so give a high-gloss finish. However, it can also have a tint of blue paint added and poured onto tables to create the look of a river, used in moulds to create coasters or even left to start to cure and moulded into bowls.
The possibilities really are endless which is the main reason we believe resin art has become so popular!
What do you need to create resin flow art?
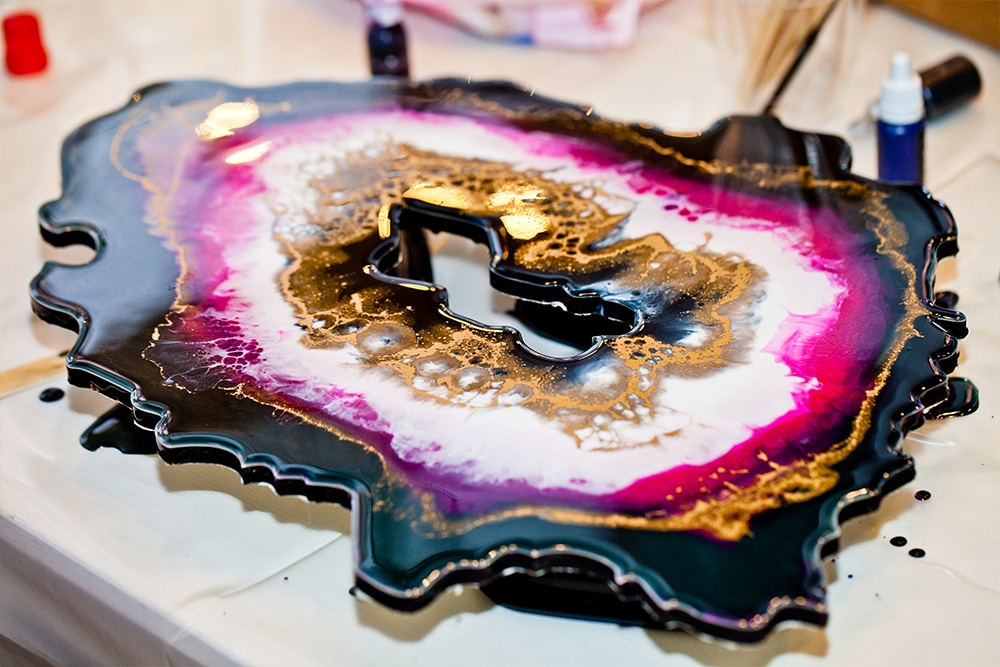
Whilst there are 101 different things you can use resin for, today we are focusing on how to create resin flow/pour art.
You will need the following items:
- Resin
- Liquid Pigments
- Powdered pigments
- Kitchen Roll
- Isopropyl alcohol (70%+)
- Mixing cups and stirring sticks
- Heat gun
- Torch
- Stands or blocks to prop your art up with
- Level
- Nitrile gloves
- Respirator mask
- Thick plastic sheeting
- Spreading tool
- Box to cover work
- Board/tray etc.
- Masking/decorators tape
Resin
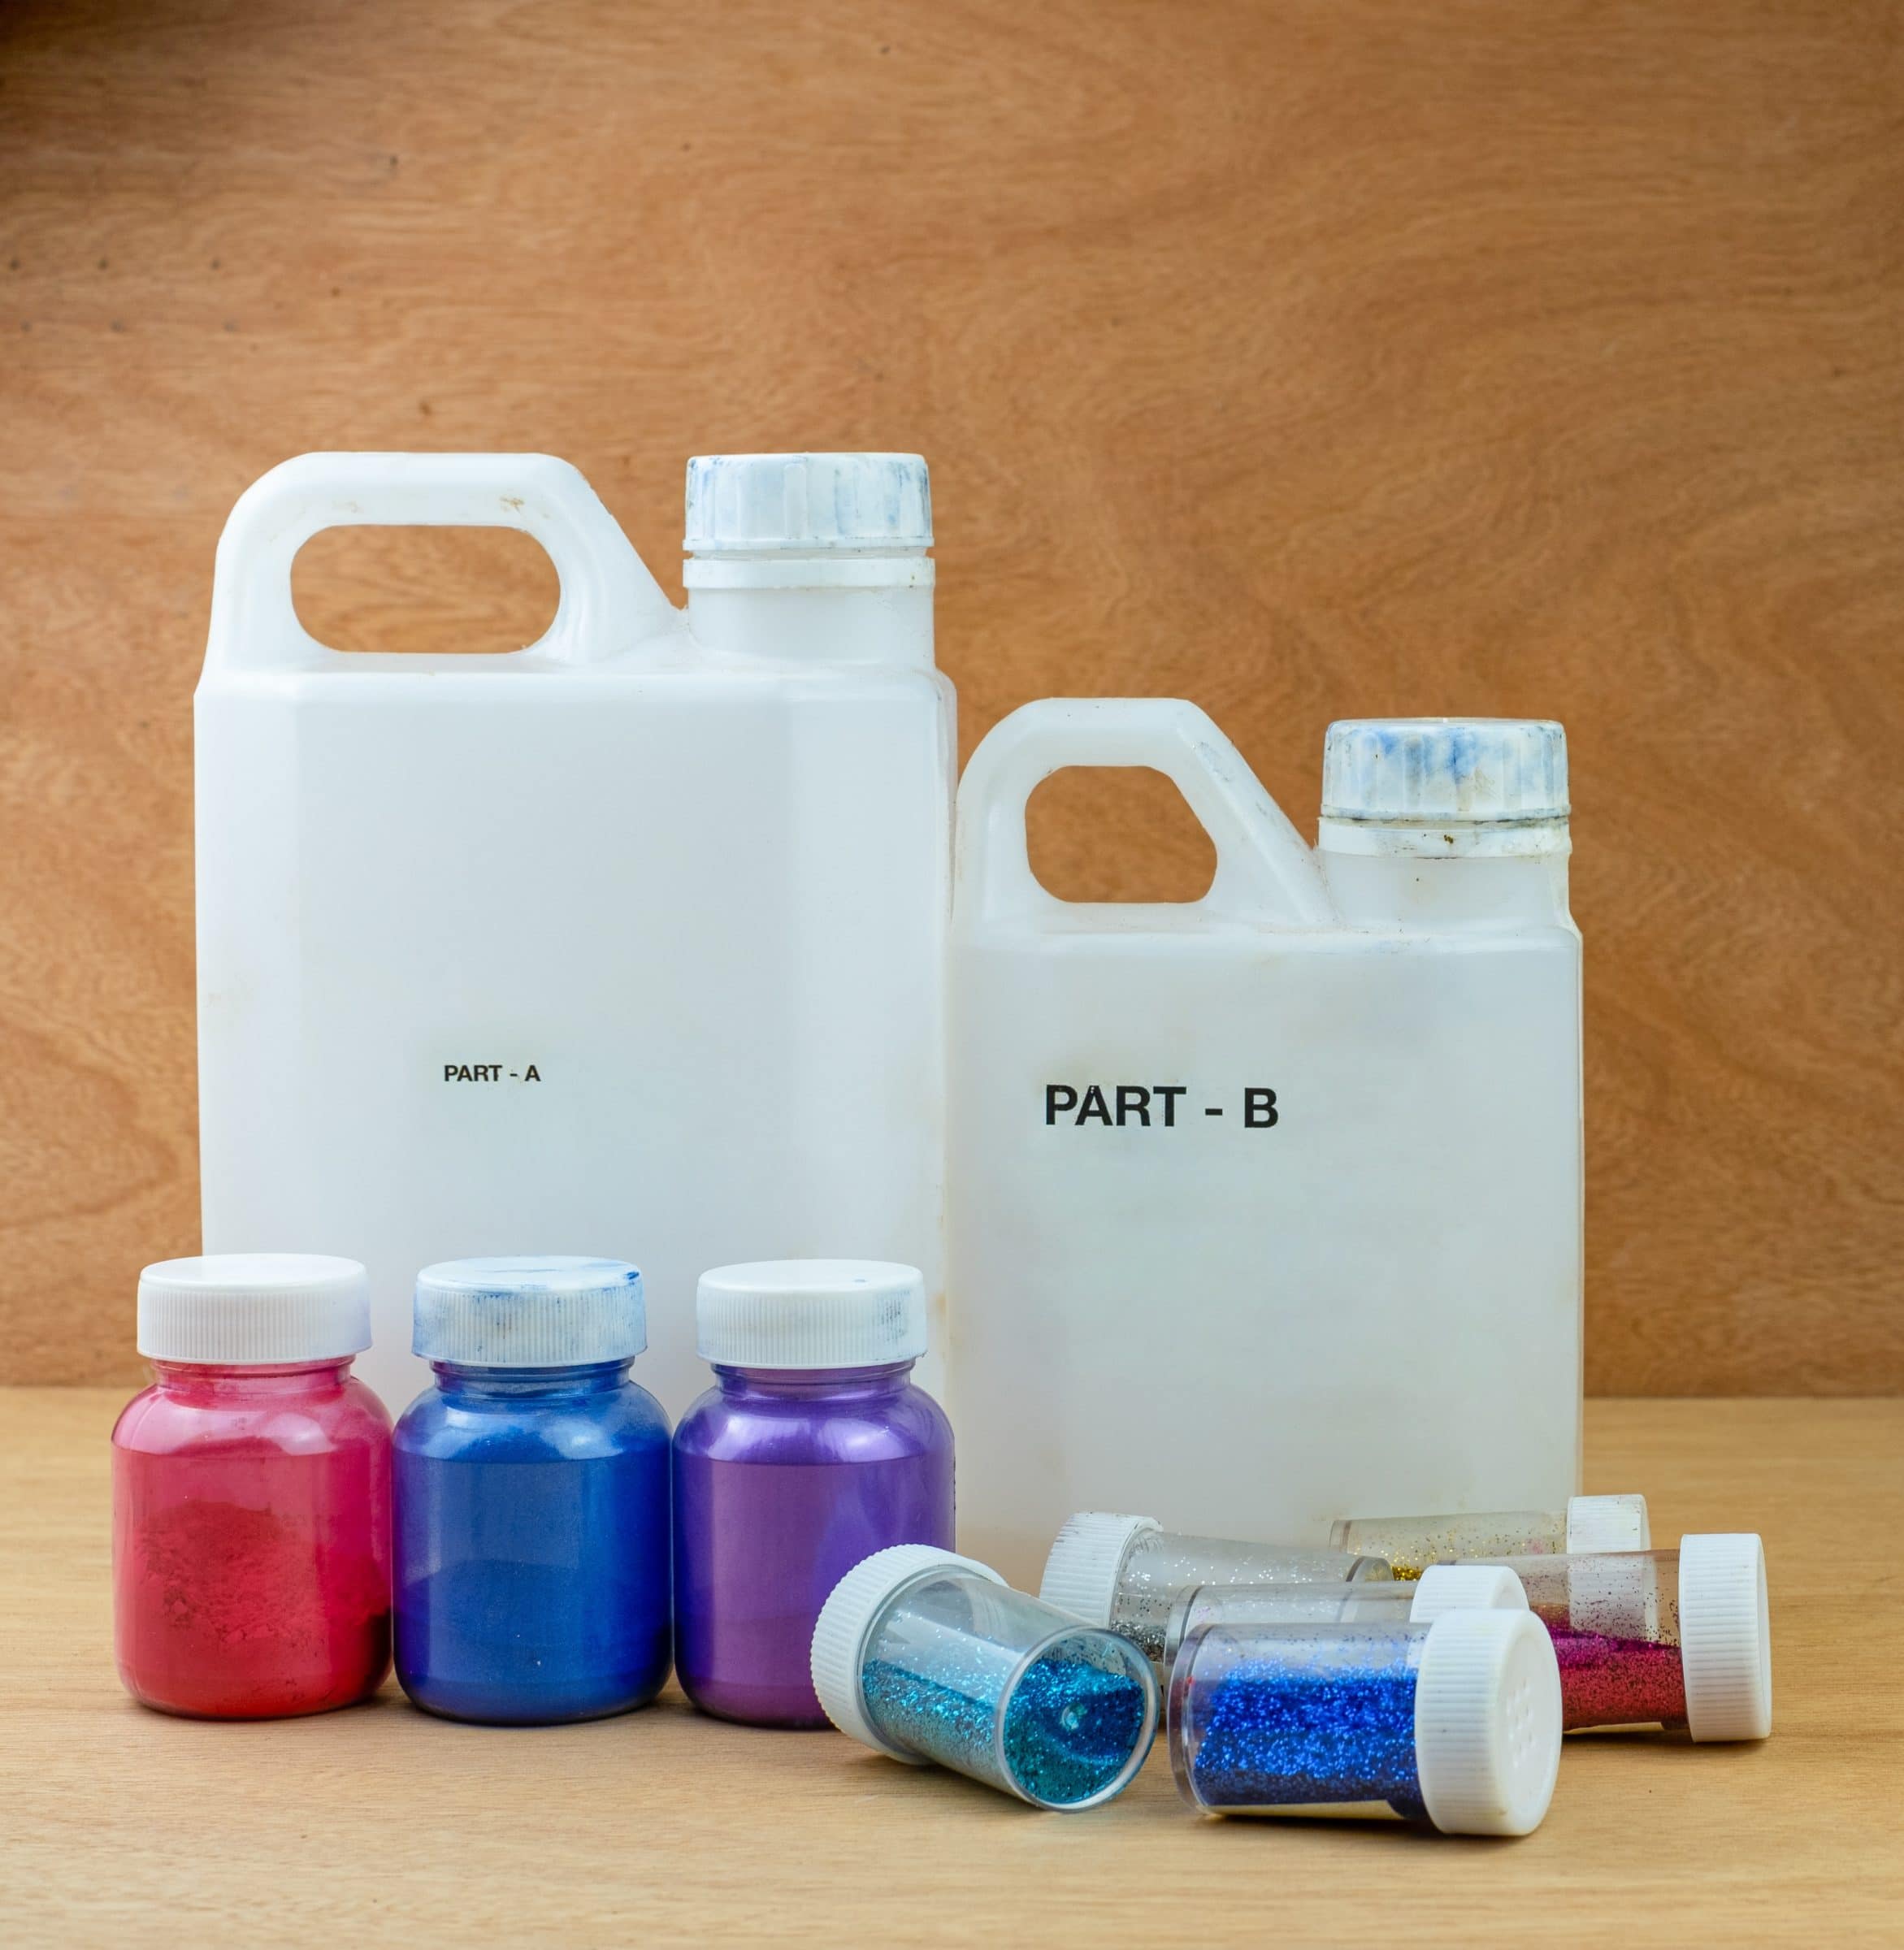
The most important thing you will need is your resin! There are a huge variety of brands of resin available and some are a lot better than others. One of the more popular ones is by Art Resin. This brand mentions a lot of good qualities you will want such as:
- No yellowing
- Long work time
- Affordable
- Low-odour
- Easy mixing ratio (1:1)
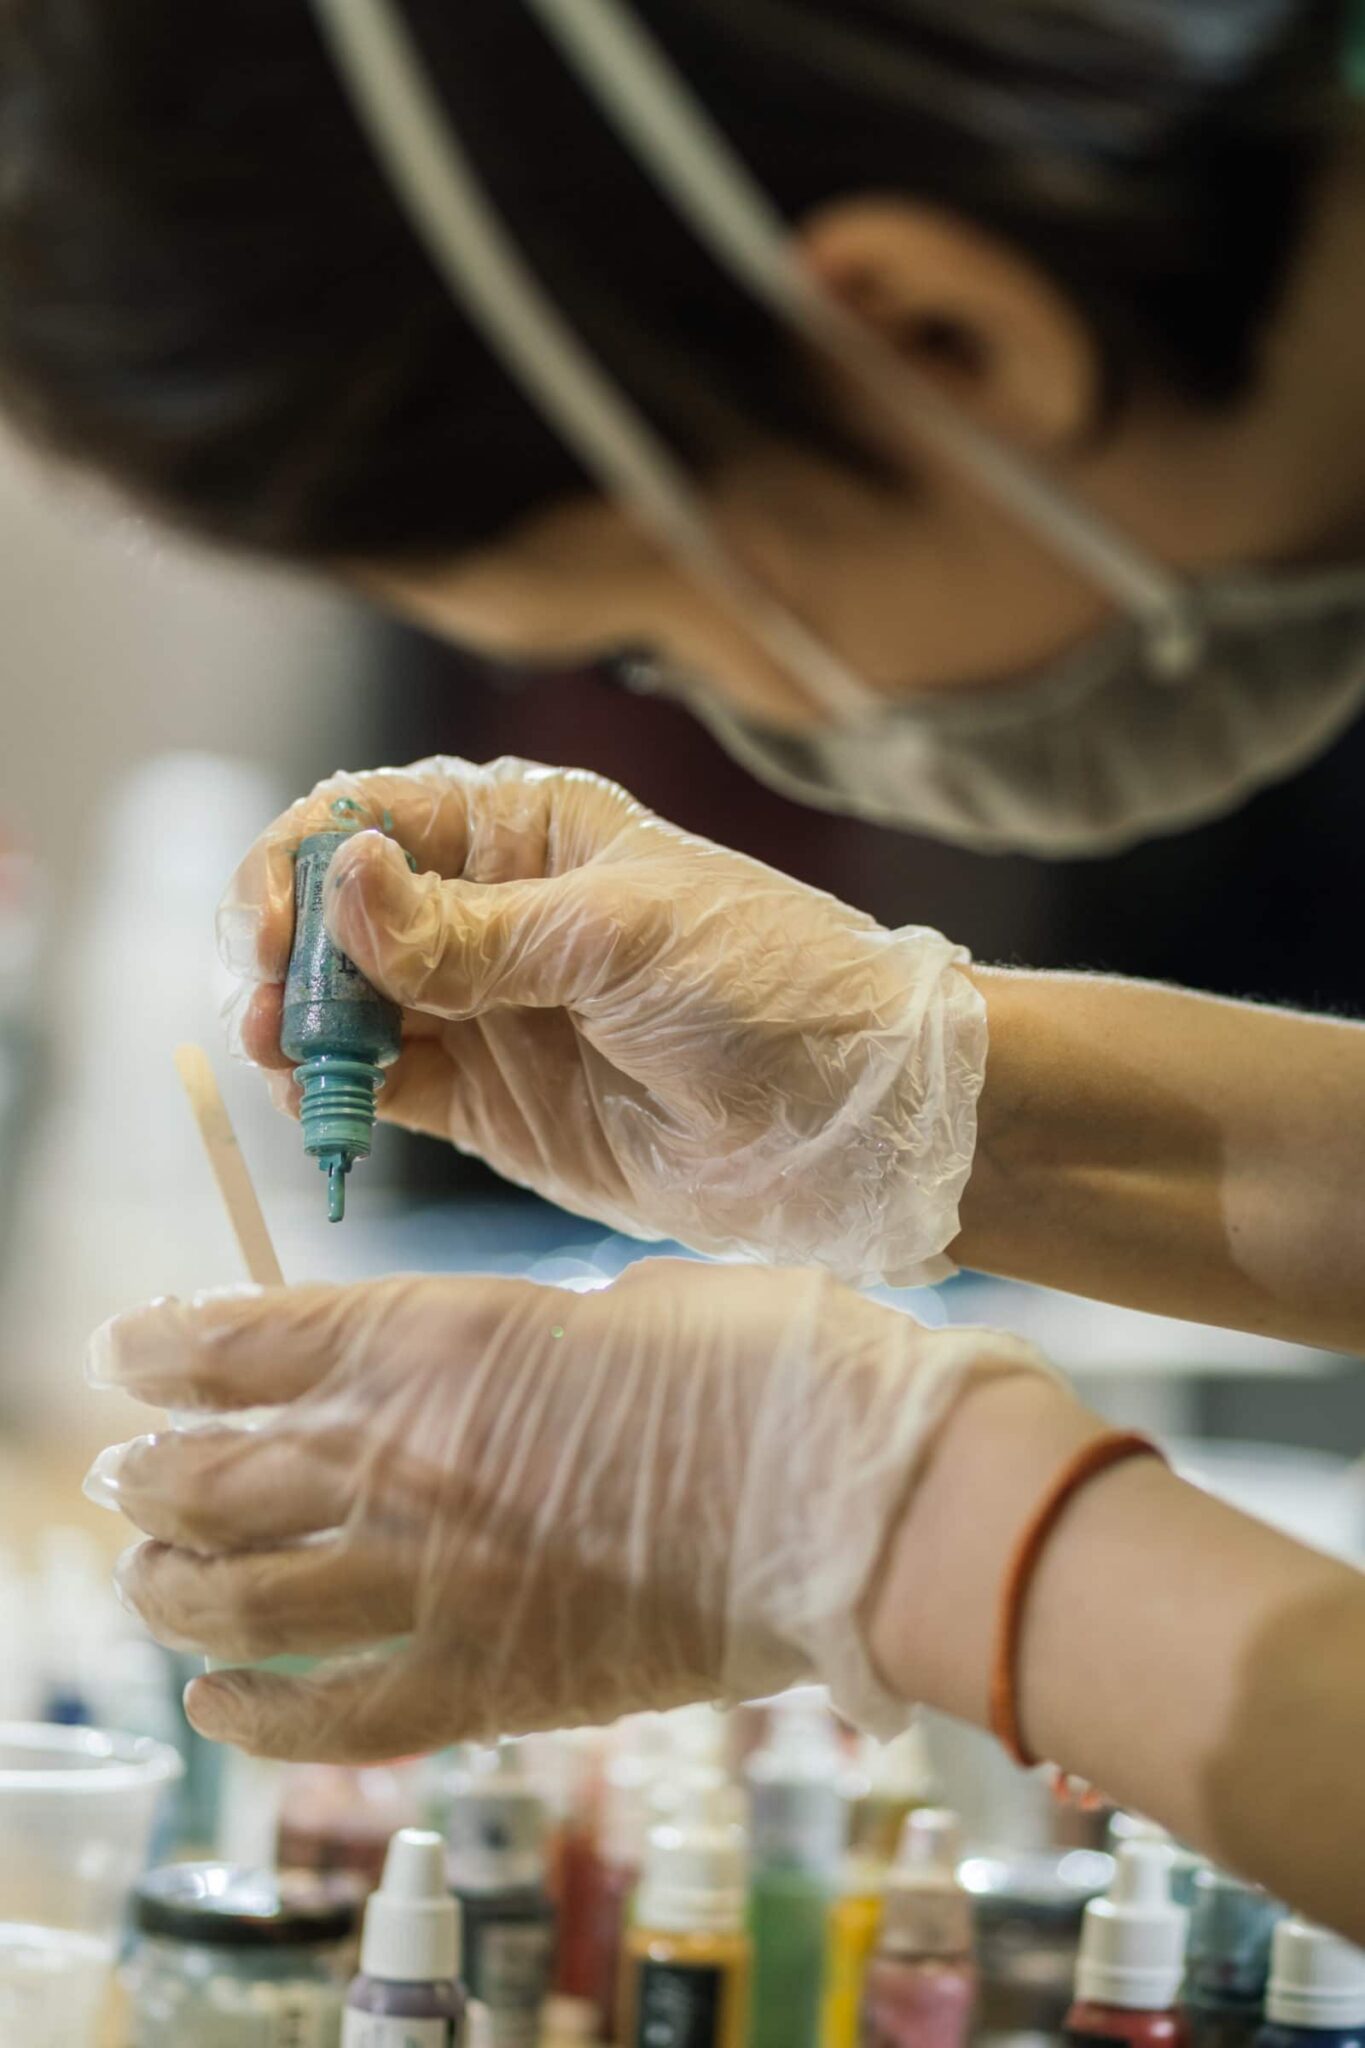
Liquid pigments
There’s a huge variety of liquid pigments on the market and can be a little overwhelming. The main factor to take into account is to know what the ingredients are in them. This is important information to know if you are going to use an open flame to remove bubbles as they may react with the fire.
Today we will be mentioning Resin Tint by Art Resin. These are oil-based pigments so will not react with the flame and keep your eyebrows firmly on your face!
It is recommended that you only add a few drops at a time and be sure to mix the resin thoroughly before adding any more. You can always add more pigment but you can’t really take it away – at least not very easily!
Remember how much you are adding to your resin as anything over 6% can throw off the resin and hardener ratio. This can cause the resin to not dry properly.
Powdered pigments
Powdered pigments (also known as mica powder) is highly pigmented and use in a wide variety of things such as nail polish and makeup. It is great for use in resin art as you can get varying levels of textured powder to create dimension, colour shifts or even sparkles.
Similarly to liquid pigments, you will want to keep track of how much you are using. Mica powders can very quickly disturb the resin ratio – we always recommend airing on the side of caution and using as little as possible.
Kitchen Roll
Once you have emptied your measuring cups of resin, you might want to use disposable kitchen roll to remove the excess resin inside the cups. We also recommend having it on stand by just in case of any accidental spills.
Isopropyl alcohol (70%+)
Once you have used some kitchen roll to wipe your measuring cups of excess resin, you will need to use some isopropyl alcohol (minimum 70%) to remove the last remnants of the resin.
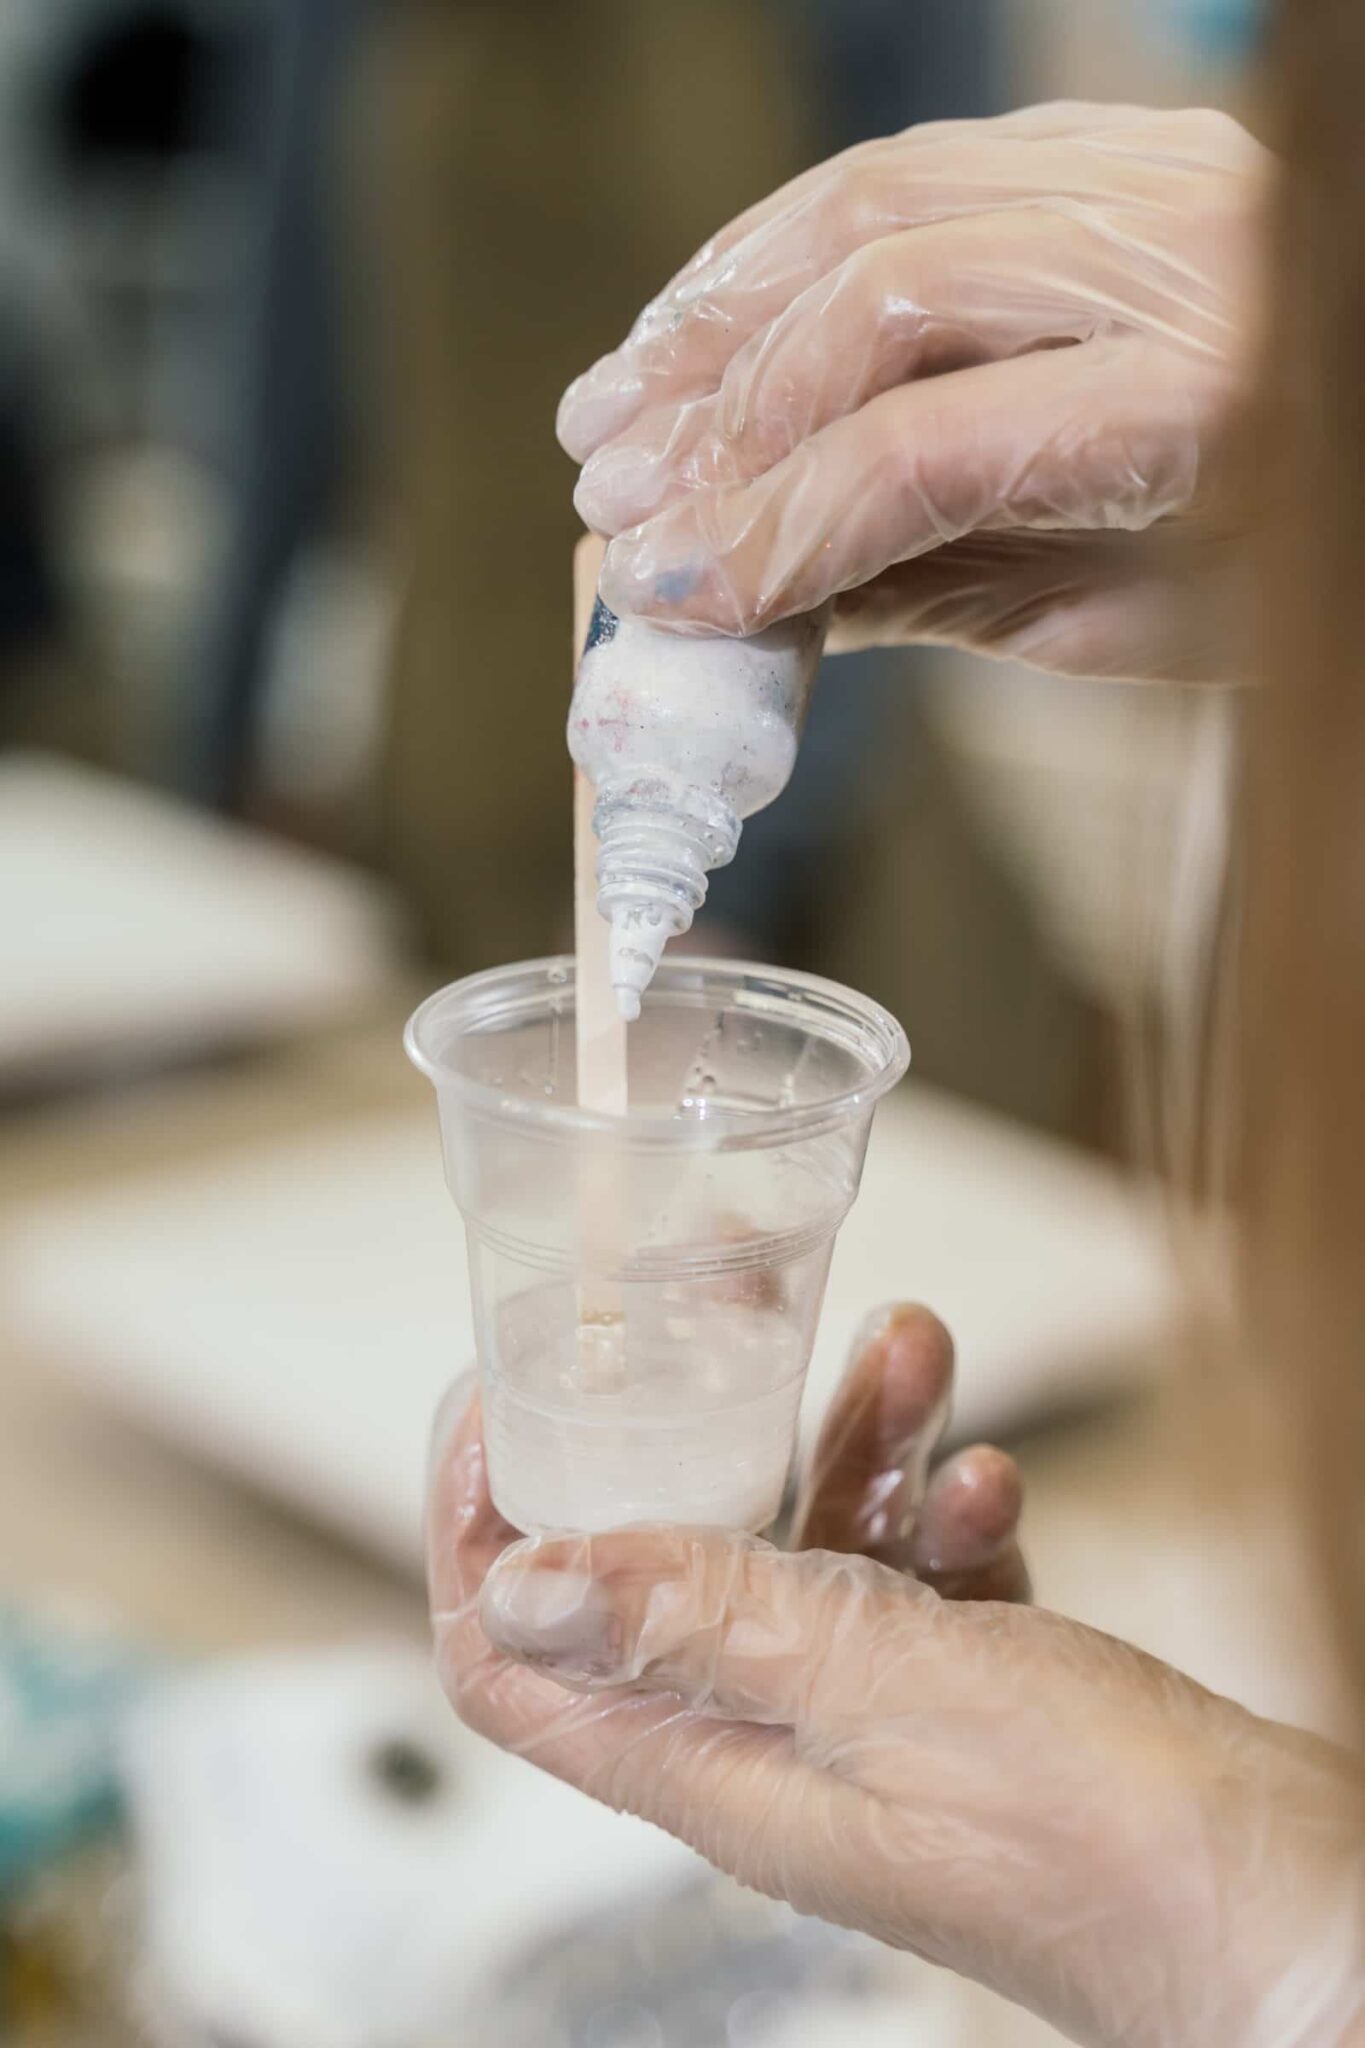
Mixing cups and stirring sticks
Depending on the amount of colour you are using in your art piece will depend on how many mixing cups you will require. We have seen some people using recyclable paper cups and some people use thick clear plastic cups that can be cleaned and used again and again. Both work just as well as each other so it’s down to your preference.
You will also need sticks to stir your resin up. Similar to the cups, the amount you will need will be dependant on the number of colours you are using. For quicker and more effective stirring, we recommend using something flat like a lollypop stick or a tongue depressor.
Heat gun
Using a heat gun is a fantastic way to move poured resin around a surface to create different effects such as lacing.
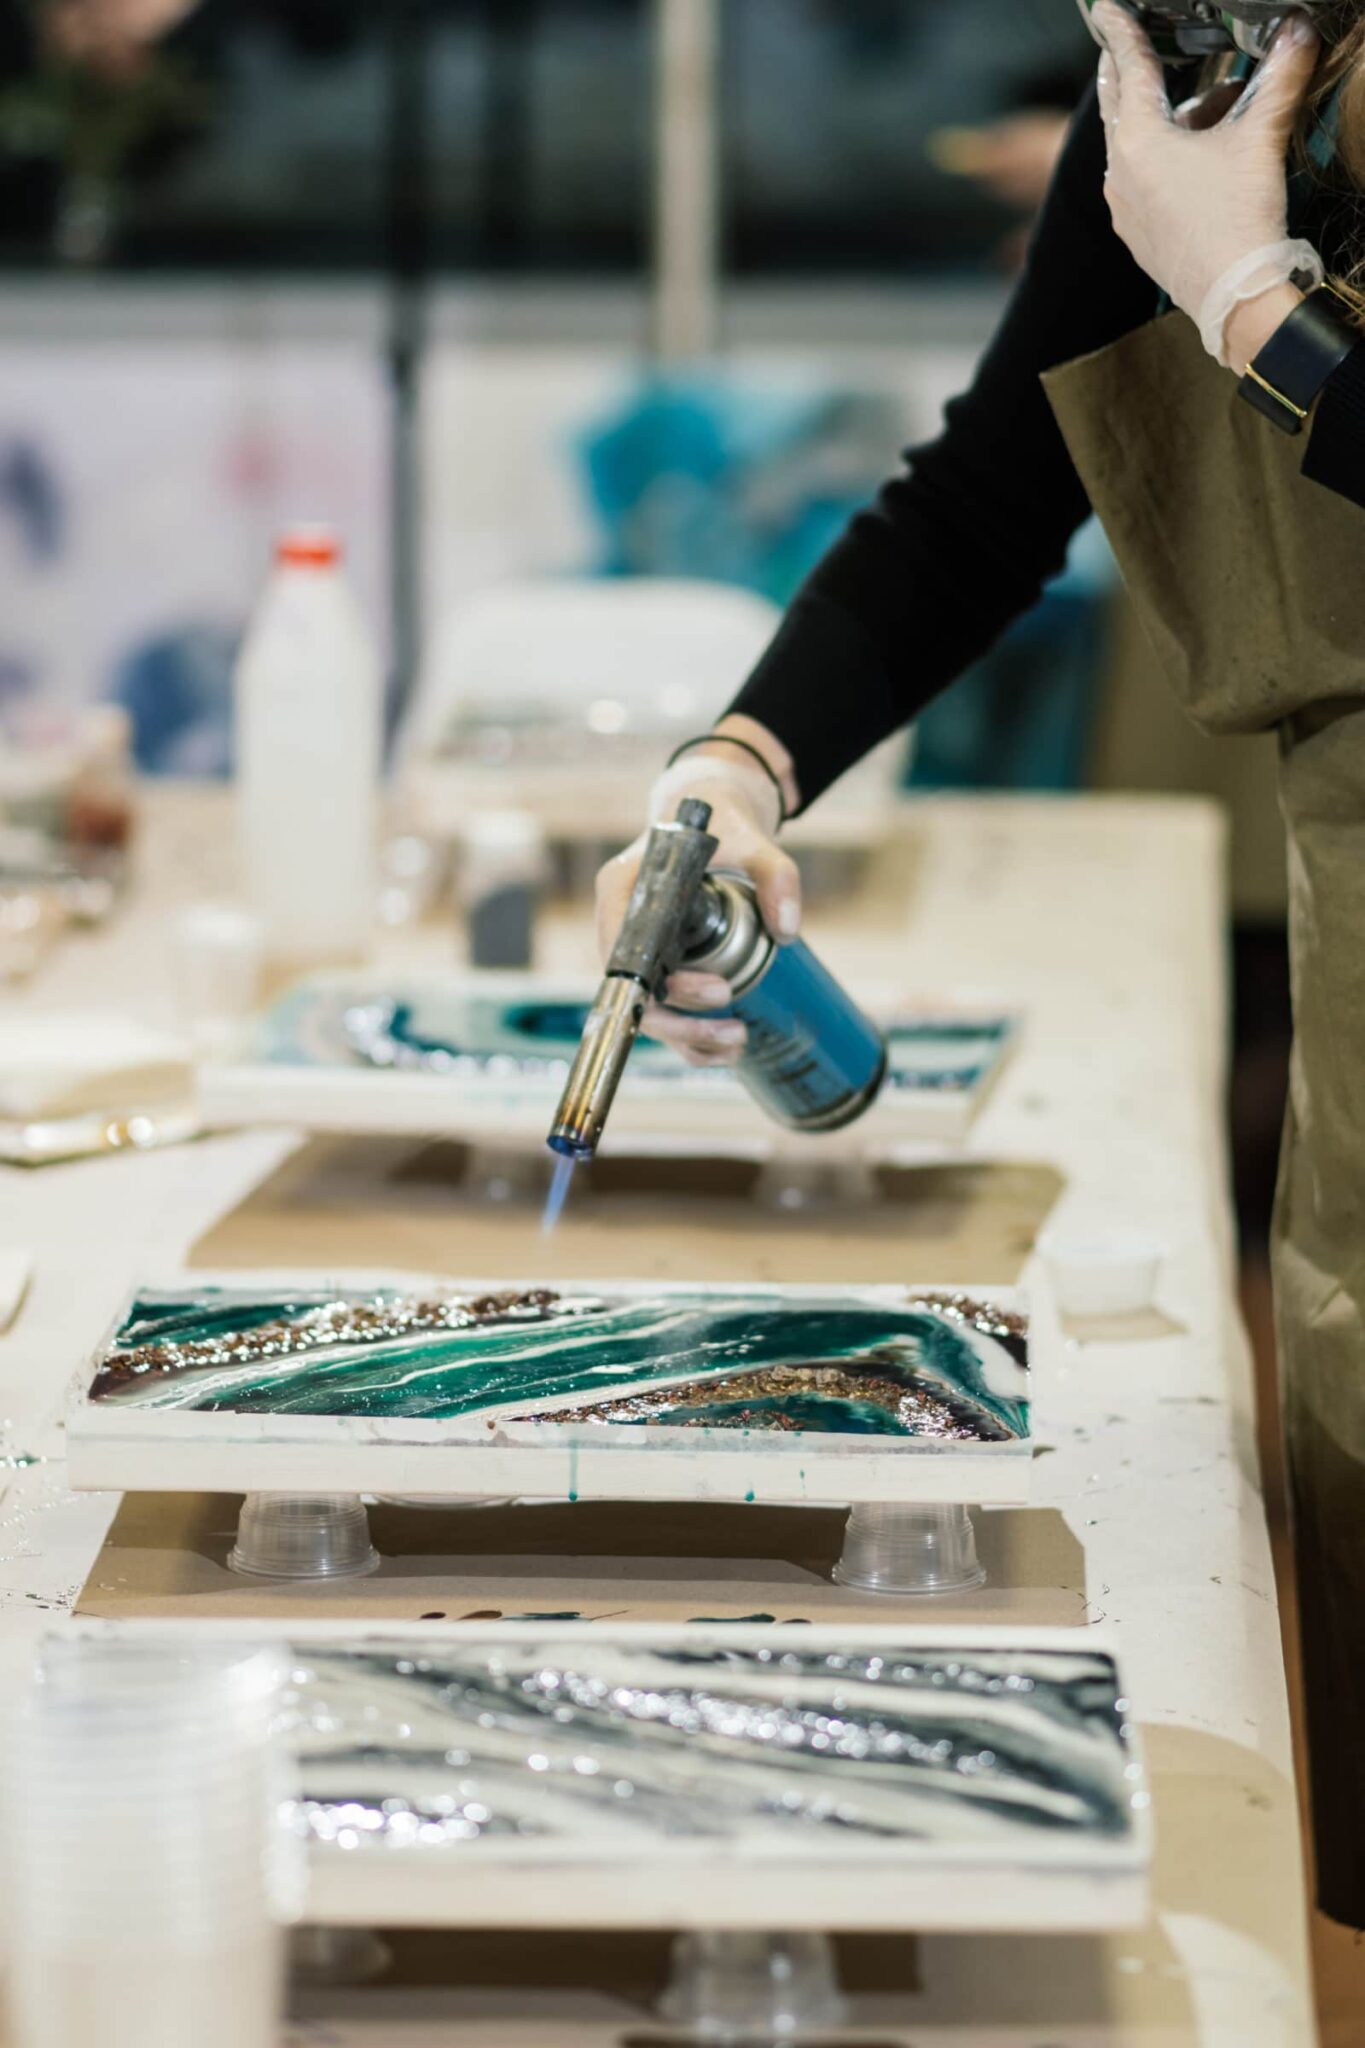
Torch
A flame torch is a very handy piece of kit to have if you are looking to create very smooth art with no air bubbles. Whilst there are other ways to remove air bubbles, such as by using a tooth pick, it is very time consuming and in the end will never be as good a finished result no matter how hard you try.
We have also seen some people use alcohol spray to pop the bubbles with varying results. We don’t recommend doing it this way as adding contaminants could upset the resin ratio.
Stands or blocks to prop your art up with
A very important step before pouring your resin is to prop up your working surface from the table. Resin will slowly move to self-level and will eventually drip off the edges of your board/canvas etc. Therefore if your work surface is flat to the table, you will struggle to get it back off in one piece.
The use of stands of blocks that are the same height and strength to keep your work propped up off the table is highly recommended.
Level
One of the most vital things to have when creating resin art pours is having a flat surface. This is because resin in self-levelling and even a small tilt in one direction will result in your resin being tipped off/pushed up against the side of your tray etc.
Using a spirit level on your work space is vital to creating a perfectly flat piece of art.
Nitrile gloves
Whilst there are a wide variety of gloves on the market, we recommend using nitrile gloves. This is because they tend to fit well and are very strong, but more importantly, they are resistant to oils and other chemicals.
Respirator mask
If you plan on creating a very large piece of resin art, or plan to use it very often, then we recommend investing in a respirator mask. This is because resin releases fumes that over time could be harmful. If you only plan on creating a small piece then a mask isn’t completely necessary.
FYI, dust masks such as the type used for decorating generally won’t do much to protect you from fumes. If you plan on getting a mask, you will want to invest in a more substantial respirator mask.
Thick plastic sheeting
One main thing to take note of is that resin art is very messy! We highly recommend you cover your work area with thick plastic sheeting to catch all your drips and spills. Thick plastic sheeting is handy to use as it is reusable – simply wait for the resin to try and peel it off!
Spreading tools
The use of different spreading tools will depend on the amount of resin you need to move and what kind of effect you are wanting to create.
If possible, we recommend using tools such as plastic/rubber spatulas and tools. This is because once you have moved the resin you can just simply wipe the resin off the tool with a piece of kitchen roll and give it a quick spray of isopropyl alcohol. Quick, easy to use and reusable!
Box to cover work
Once you are happy with your work you will then need to leave it to cure. Make sure you follow the brands’ guides and leave it for the amount of time they say (usually 72 hours). Whilst the piece is drying you will want to make sure your art doesn’t get any dust particles, stray hairs etc. landing in your latest piece of art.
We recommend covering it with a box or something similar but anything will do.
Board/tray/canvas etc.
Or pretty much just whatever you plan on creating your art on! We recommend you consider what colours you are going to use early on as this may affect what you will need to do to prep the item you are pouring on to.
For example, if the colours you plan to use are transparent you might want to make sure your substrate is in good condition to pour onto as you will most likely be able to see it through the resin. If this is the case you might want to consider painting the surface before you begin.
Masking/decorators tape
Not necessarily a must-have but some people will use masking/decorators tape to keep some areas of their work resin-free – such as the sides of a canvas for example.
This is all dependant on your taste, style and the look you are going for.
How to create your first resin painting
To create your first piece you will want to plan the design, look and feel. There are a huge variety of pour techniques including the puddle pour, dirty pour, flip cup pour and more! Once you have everything planned out you are ready to begin.
- Your work area should be clean, dust free and well ventilated.
- Make sure you wear something you don’t mind getting messy.
- Prepare your workspace by laying down your heavy plastic sheeting onto your table.
- Once your work space is prepped you can prep your substrate. If you plan on using masking/decorators tape, apply that at this stage.
- Place your substrate on top of your stands.
- Use a level to make sure that the substrate is as level as possible. If necessary, you can prop something under the stand/s to flatten it.
- Put on your gloves.
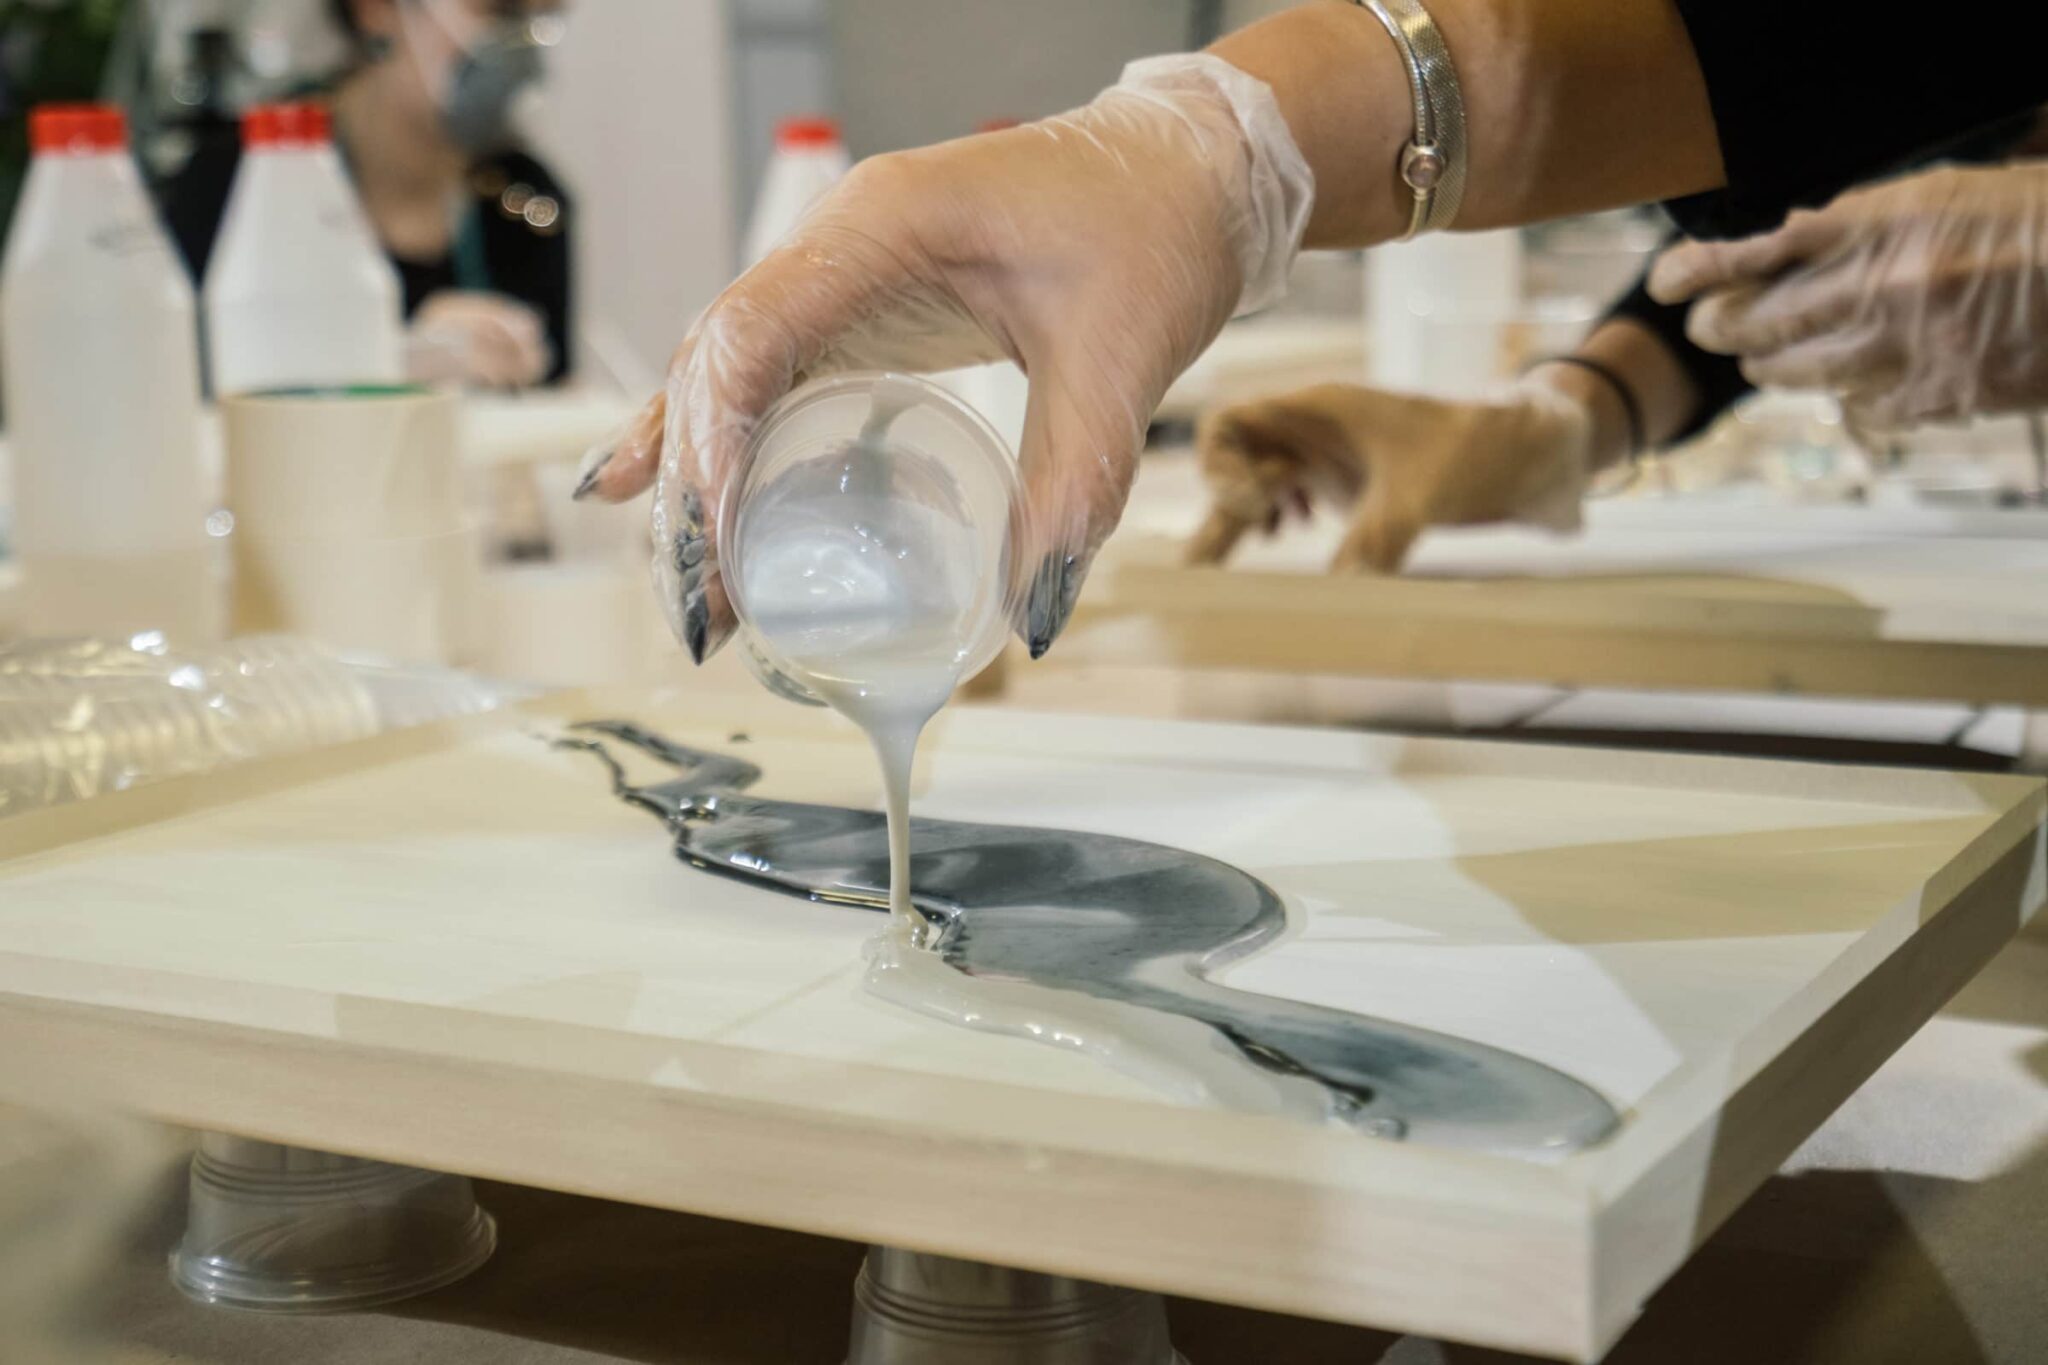
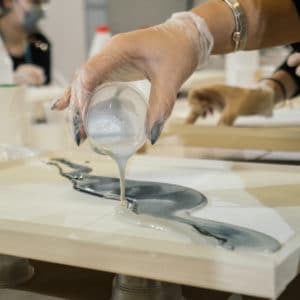
- Measure out the specified amounts of resin as per the instructions and mix.
- It is likely you will need to mix the resin thoroughly for around 3 minutes, however, be sure to read the manufacturers instructions carefully and do it for as long as they specify.
Now you are ready, it’s time to get creative!
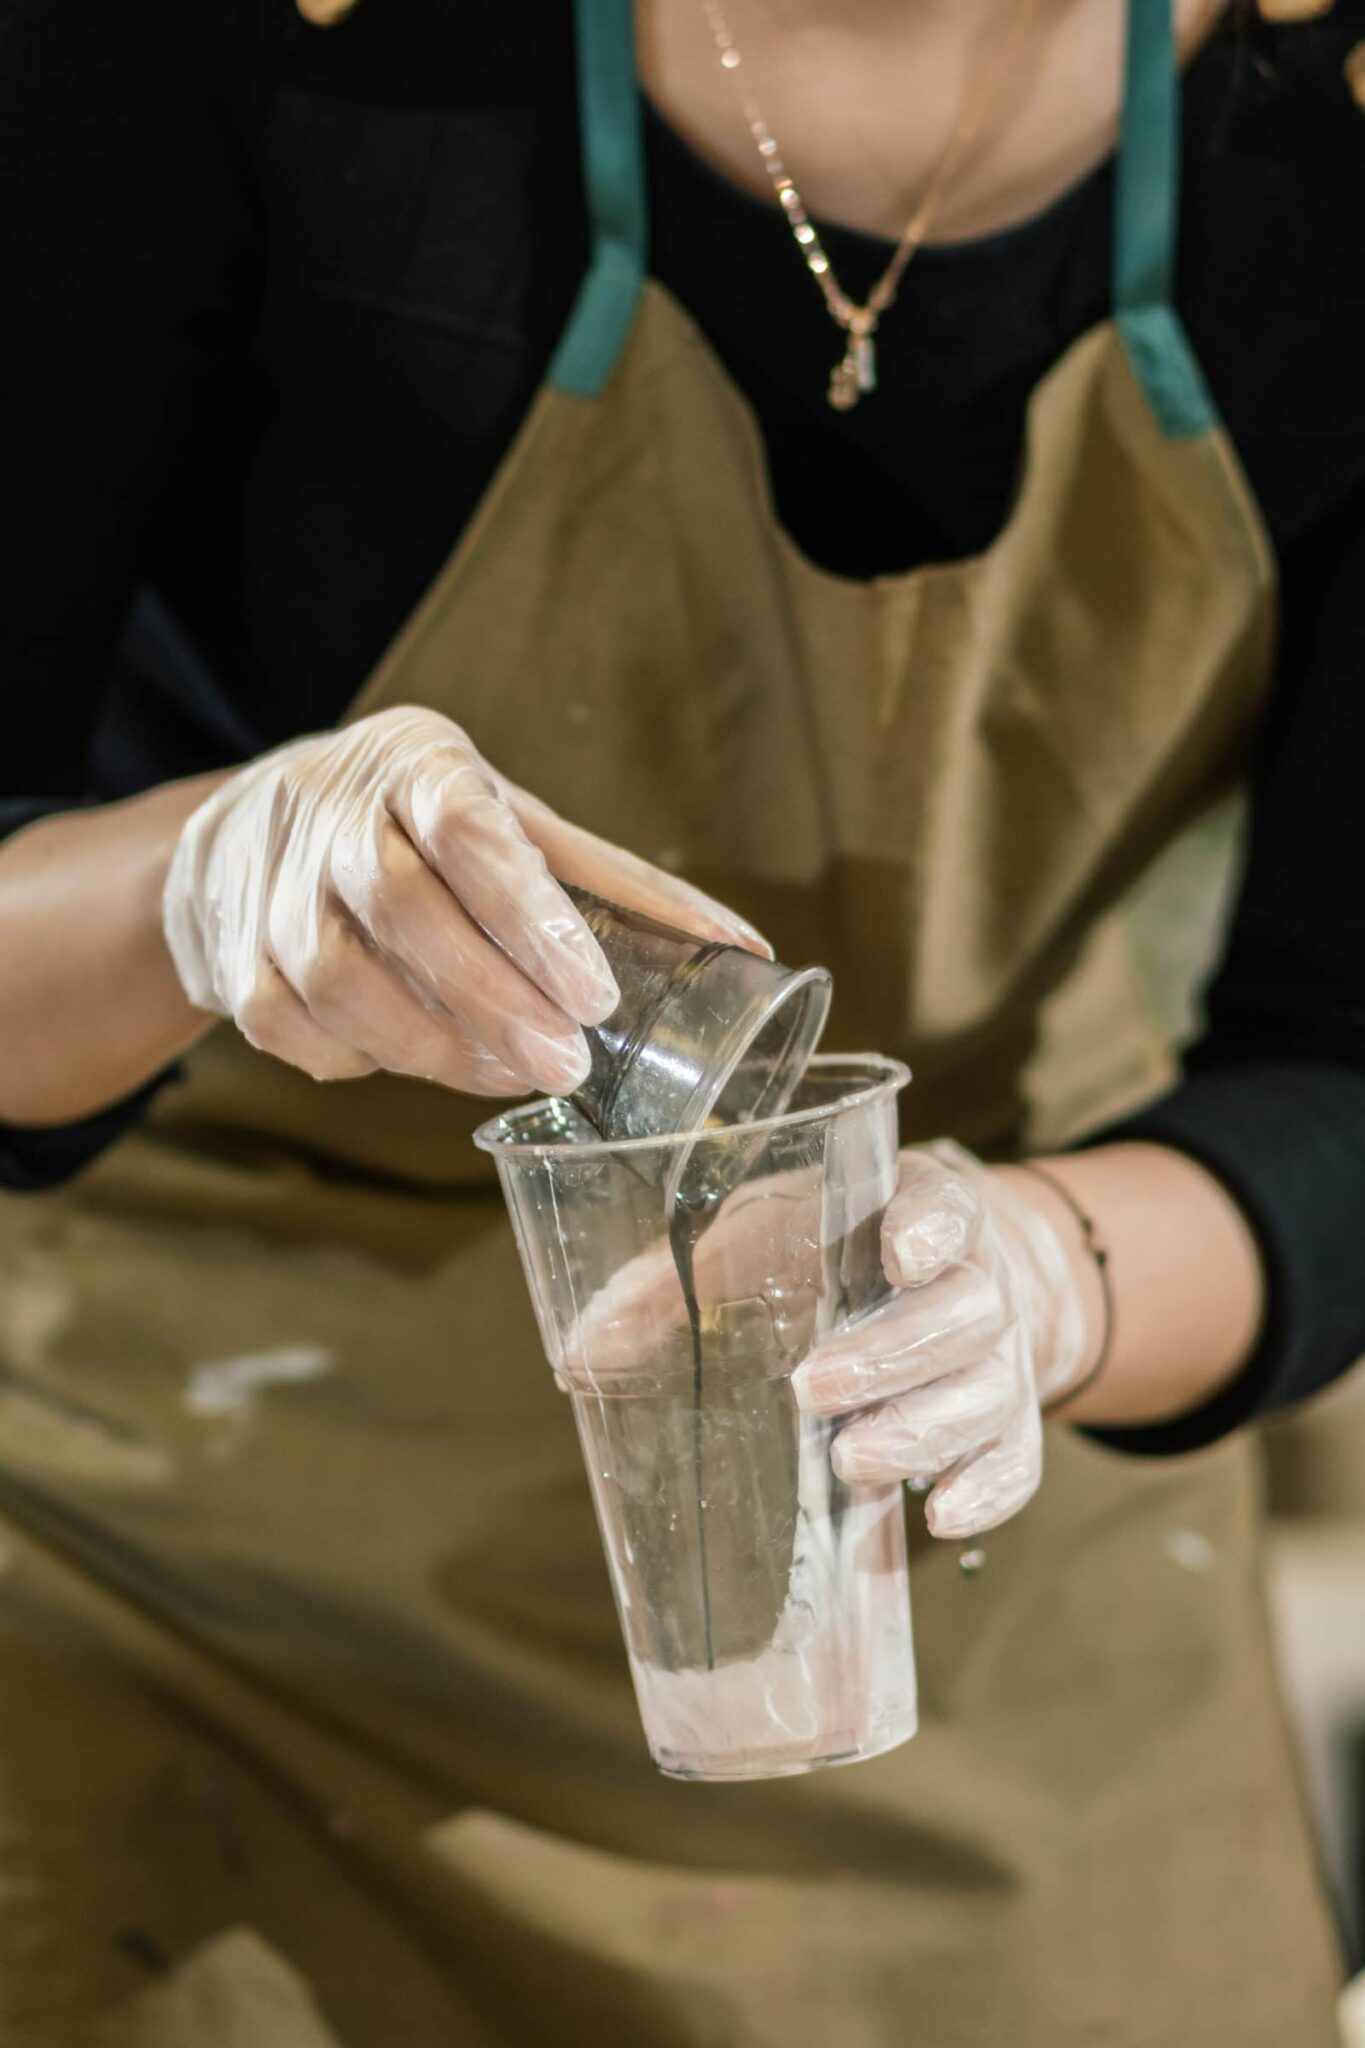
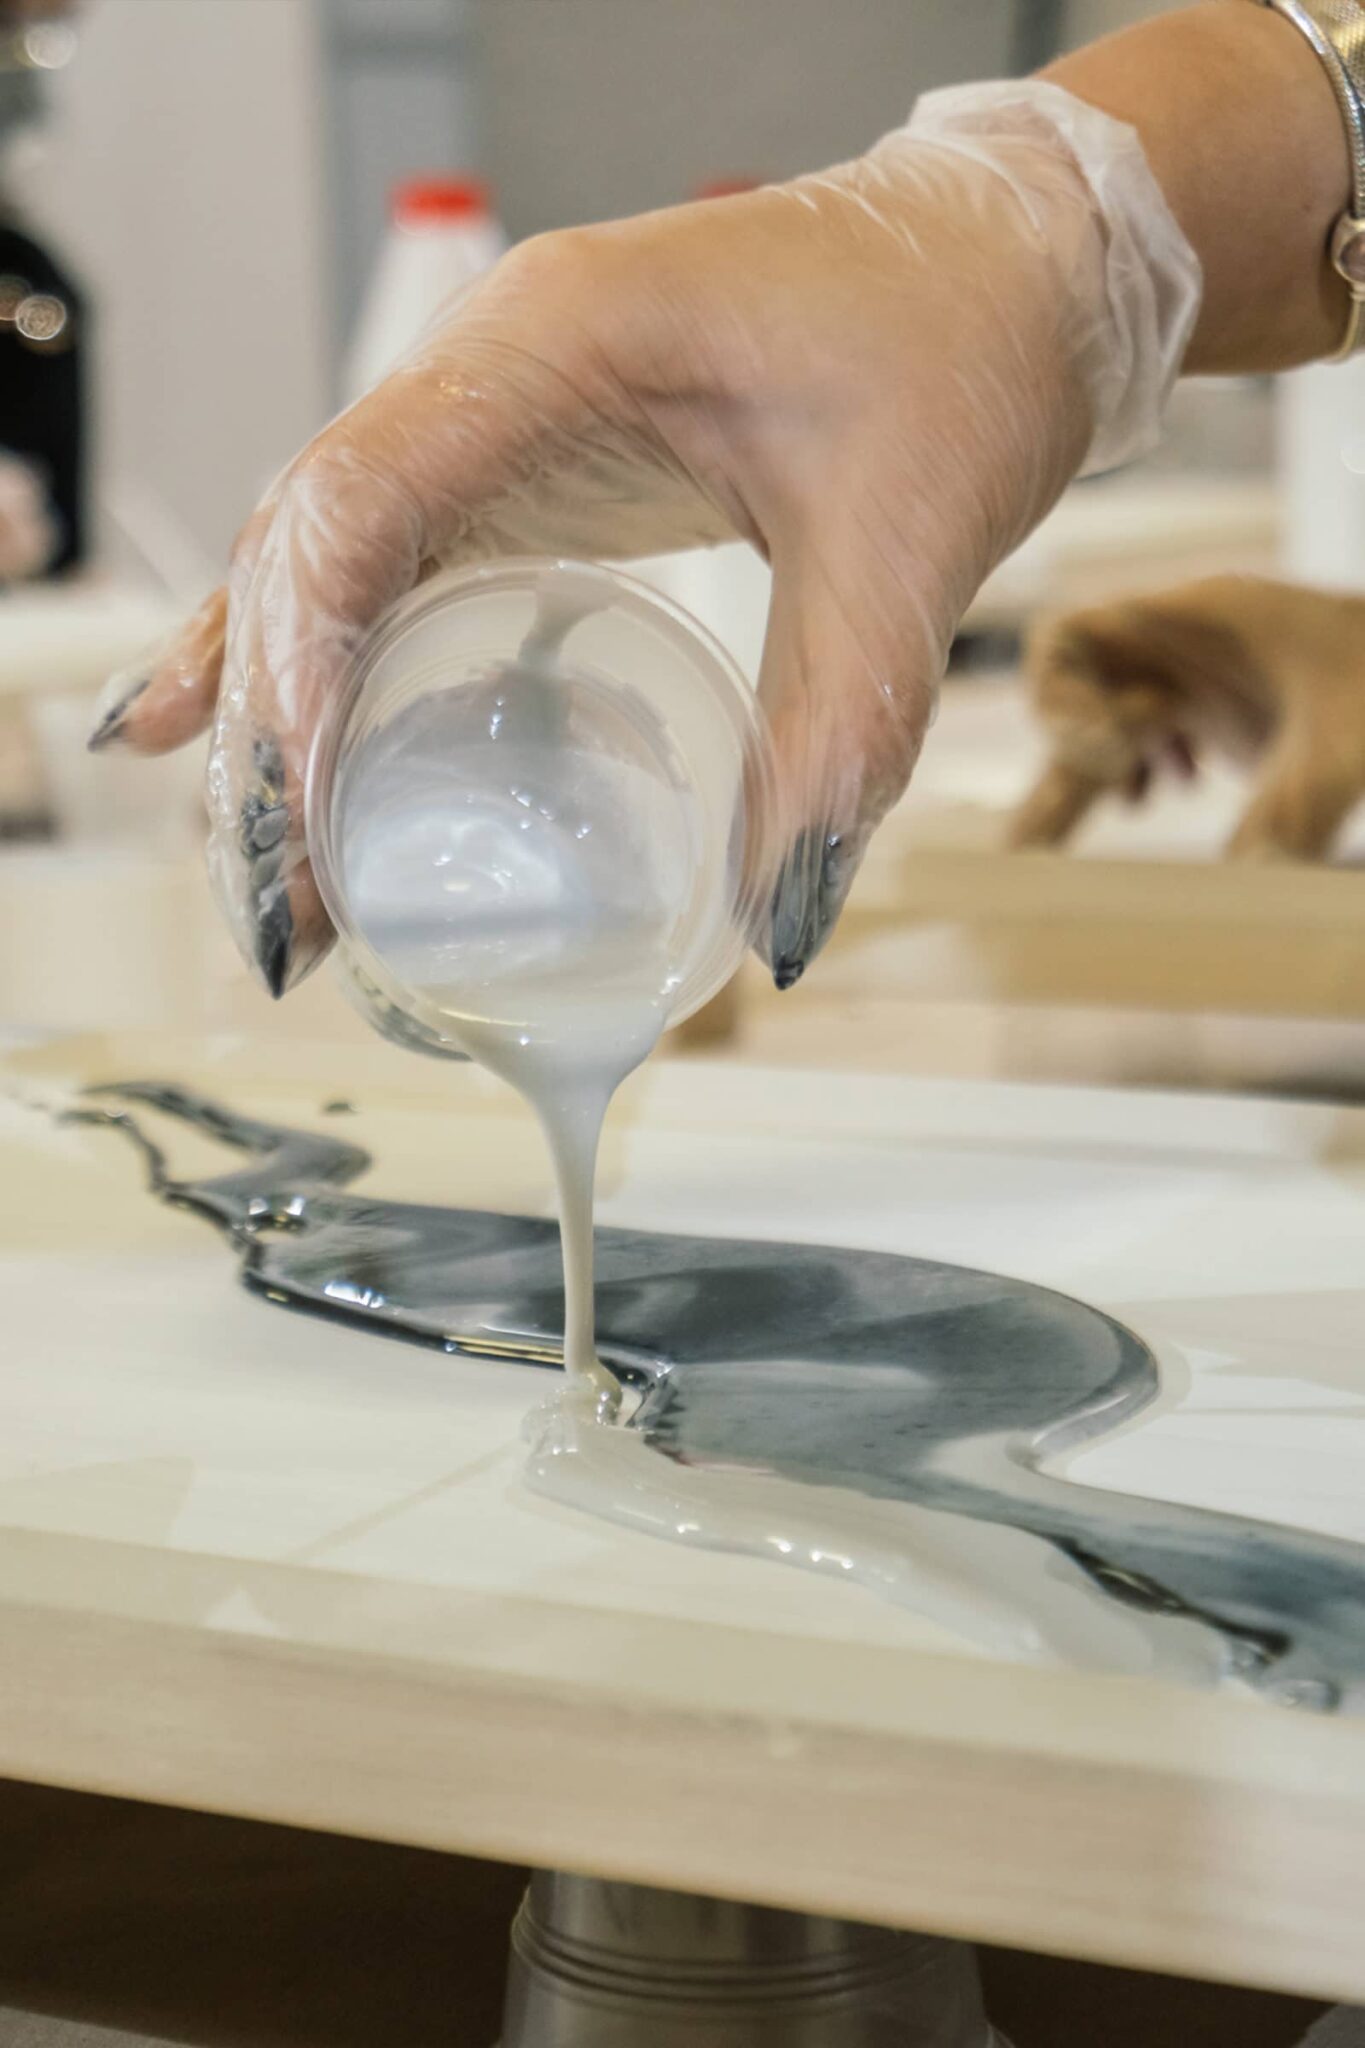
- Decant the mixed resin into your mixing cups – use one for each colour you plan to use.
- Add your pigment to your resin cups and thoroughly mix them. Be cautious as to how much pigment you are using as to not upset the ratio.
- If you would like to create cells, then you should now add a few drops of silicone to create them. Thoroughly mix the resin again once added.
You are now ready to go!
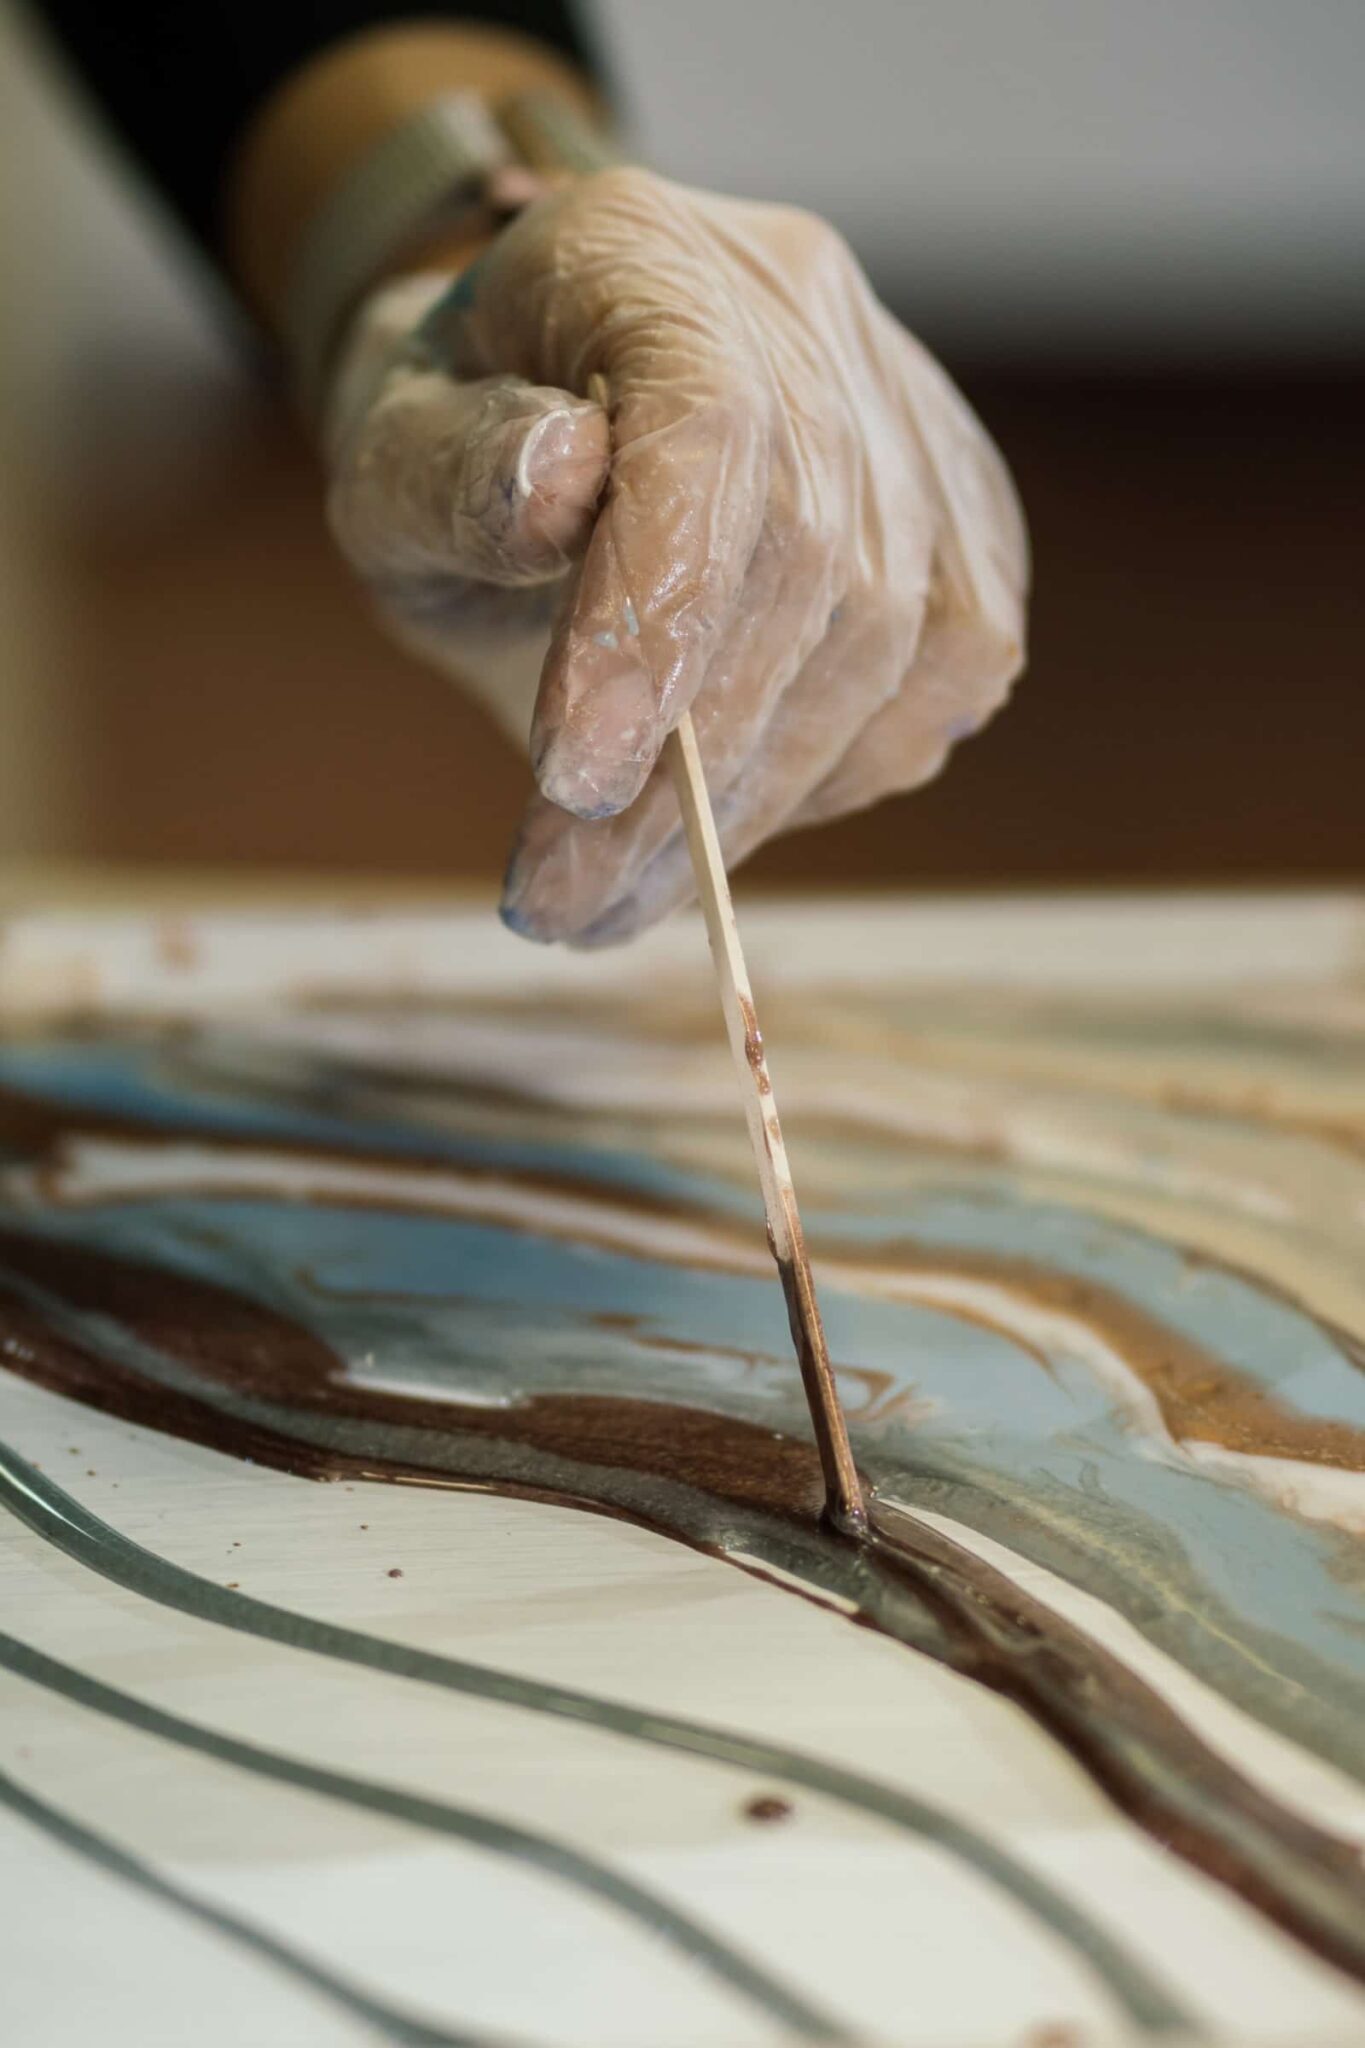
You can always help move the resin by tipping the canvas or by using something such as a plastic spatula or wooden stick.
If you have bubbles appearing once you have poured the resin out, you can use a blow torch to pop them. To do this simply run the lit torch over them very quickly and very lightly. Do not ever keep the torch in one place.
Remember that different resins have different curing times so it’s important to keep an eye on the time. We recommend you create your piece as quickly as you possibly can. This is because you will find that if you are still moving it once the curing has begun, it will become difficult to move and appear stringy like chewing gum.
Once you are happy with the piece, take a nice close look for hairs, dust etc. that may have settled in the resin. You can remove these with a toothpick of tweezers.
Finally, you should cover you art with a box, or something similar, and leave it to cure. In most cases, resin is usually hard after 24 hours but can still be easily damaged if handled poorly. As stated earlier, each brand is different but it usually takes 3 days for resin to fully cure.
How to clean up
If you have some residue left inside your measuring and/or mixing cups, this can easily be removed. We have found the best way to do it is to tip the cups upside down onto your thick plastic sheeting and just let the residue slowly drip out. Make sure to leave them for 5 hours or so and then you will find you can then simply pull up the cup up and remove the now firm resin from off the table.
Remember to clean any tools that came in touch with the resin with isopropyl alcohol.
If you accidently got some resin onto your skin then we recommend using some vinegar and then soapy water to remove it. We have also seen people use isopropyl alcohol, however, we don’t reallt recommend doing this as it can quickly dry out your skin and cause damage. We especially do not recommend it if you have sensitive skin.
There are also purpose made soaps available from DIY that will remove it should the vinegar and soap water not work.
We hope you found this post helpful. If you have any other tips, tricks or advice, please feel free to leave them in the comments below. We love hearing from you!
Want to keep up with all things Owatrol? Why not follow us on social media? You can find us on Facebook and Instagram at @owatrolireland or at the hashtag #owatrolireland
About Owatrol Team
Our team are ready and willing to support you with your requirements whether it is protecting your newly laid deck or renovating a luxury yacht, whatever the application Owatrol has the solution you are looking for.